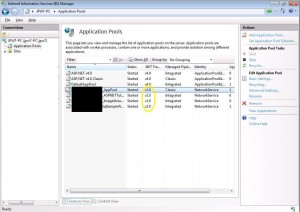
InstallShield allows for an easy way to create Application Pools using the Internet Information Service under Server Configuration in the Installation Designer view (at least easily for IIS6.0 and later which is all I’m concerned about in this post). As you can see in the image below, .NET FW v2.0 is set by default. (click for full size)
What IS doesn’t allow, is for you to set the .NET Framework version for the App Pool to use. If you’ve created a web site or sample application that was built against a specific version of the .NET Framework (lets say 4.0 for my scenario), then you’ll need to change the App Pool .NET FW version or it will not run out of the box. Since Happy Installs = Happy(ER) Customers, we want things to work out of the box.
I needed this to work for IIS6 & IIS7. I decided to just quickly create a custom action for each (actually leveraging a current CA from a previous buildmaster to give credit where it’s due).
First create an Application Pool. Installation Designer View -> Server Configuration -> Internet Information Services -> Application Pools. Right click Application Pools and select Add Application Pool.
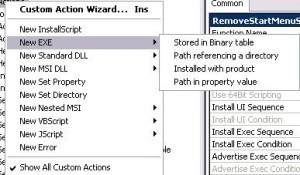
Now we will create two custom actions. One for IIS6 & one for IIS7. Go to Behavior and Logic -> Custom Actions and Sequences then right-click Custom Actions at the top and create a New EXE CA.
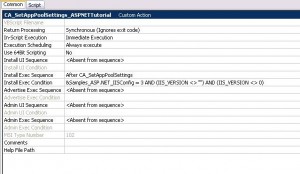
Now you’ll want to fill out your information on the right. Your working directory will be the SystemFolder since the AppCmd.exe resides there for IIS7.
Filename & Command line: [SystemFolder]\inetsrv\appcmd.exe set Apppool /apppool.name:{MyAppPoolName} /enable32BitAppOnWin64:false /ManagedPipelineMode:Classic /managedRuntimeVersion:v4.0
Remember to replace with your application pool name. Also, you’ll want to set your enable32BitAppOnWin64 value for your version of windows you are targeting.
I made my Install Exec Sequence to be “After InstallFinalize” and set my Install Exec Condition to “&Samples_ASP.NET_IISConfig = 3 AND (IIS_VERSION <> “”) AND (IIS_VERSION <> 0)”. These of course will depend on your installation and what variables you have set up.
Some more details for IIS7 and the command line I used. It’s quite simple since it can use the AppCmd.exe command line application to easily change the version of .NET Framework.
appcmd set apppool /apppool.name: {MyAppPoolName} /managedRuntimeVersion:v4.0
(src: http://technet.microsoft.com/en-us/library/cc754523(WS.10).aspx)
Replace {MyAppPooName} with the name of your Application Pool that is being installed, or already on the users machine that you need to modify.
For IIS6, I added another Custom Action using VBScript (no lectures here, it was quick and simple). I also placed this one after my previous custom action in my Install Exec Sequence.
Click over to the script Tab and use the following:
Option Explicit
On Error Resume Next
Dim IIsObjectSet
IIsObject = GetObject(“IIS://LocalHost/W3SVC/AppPools/{MyAppPooName}”)
IIsObject.Put “ManagedPipelineMode”, 1
IIsObject.Setinfo
IIsObject.Put “managedRuntimeVersion”, “v4.0″
IIsObject.Setinfo
IIsObject.Put “Enable32BitAppOnWin64″, CBool(“False”)
IIsObject.Setinfo
Again, make sure you are replacing the {MyAppPoolName} with your application pool name.
That’s it! Happy installing.
{ 0 comments }


